In this post we will create a Windows Server 2022 virtual machine (VM) using VMware Workstation Pro. There are three major steps: downloading the Windows Server installation file, creating the VM, and installing Windows Server onto the VM.
In this lab, we are using the VMware Workstation Pro hypervisor to create the Windows Server 2022 VM. If you don’t yet have a hypervisor installed on your computer, an earlier post explains the benefits of using VMware Workstation Pro instead of VirtualBox or Hyper-V. A second post explains how to configure a Windows host computer before installing VMware Workstation Pro. And a third post documents how to install the VMware Workstation Pro hypervisor.
Table of Contents This Post
This post is part of a series that documents the creation of a home lab using VMware Workstation Pro, Windows Server 2022, and Windows 11 Pro.
Home Lab Series of Posts
Download the Windows Server 2022 Installation File
You can download an evaluation version of Windows Server 2022 either at the Azure portal or from the Microsoft website. At the Microsoft site choose the ISO download for your country. If you are in the United States, click on the English, ISO downloads, 64-bit edition.
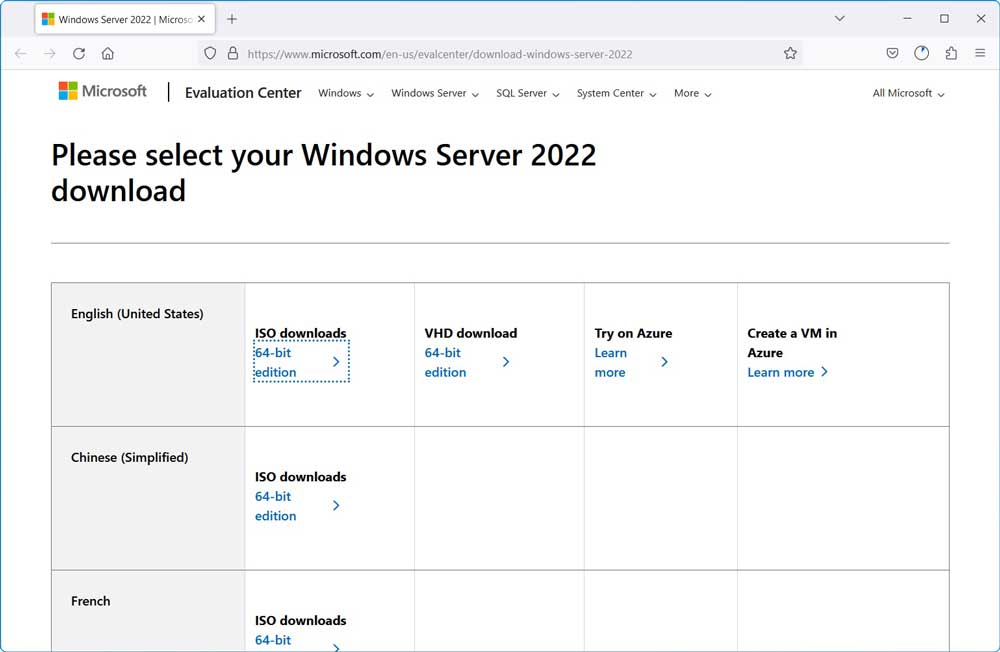
Save the file onto your host computer, such as in the Downloads folder. The iso file is large (over 4.9 GB) and will take a while to completely download.

Create a Windows Server 2022 Virtual Machine
Now that we have the Windows Server installation file, we can create our Windows Server 2022 VM. Begin by opening VMware Workstation Pro on your physical host computer.
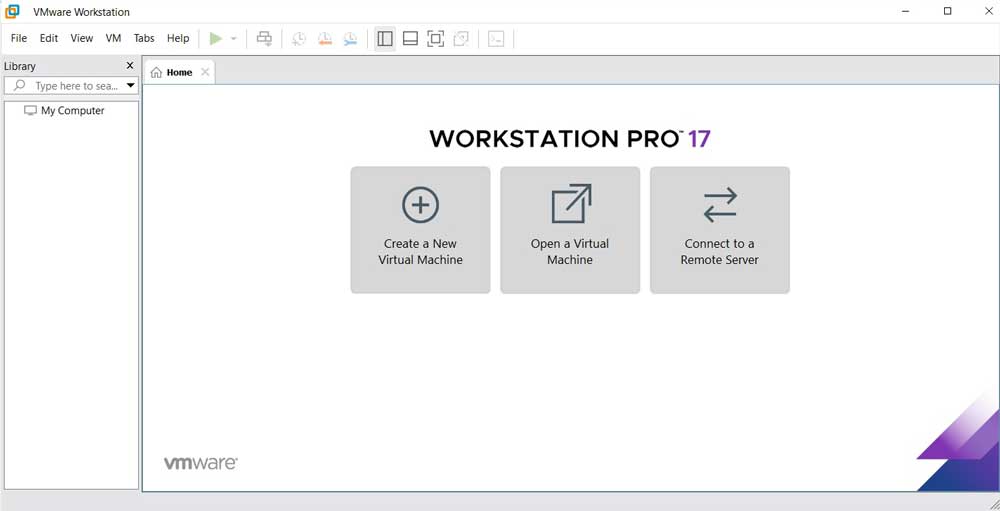
You are now ready to create a Windows Server 2022 VM. Begin by clicking the button “Create a New Virtual Machine” or click on File > New Virtual Machine in the top menu.
A pop-up window will appear “New Virtual Machine Wizard.”
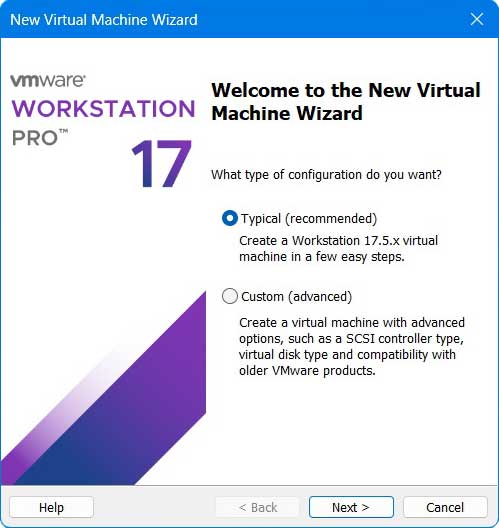
Select Typical and click the Next button.
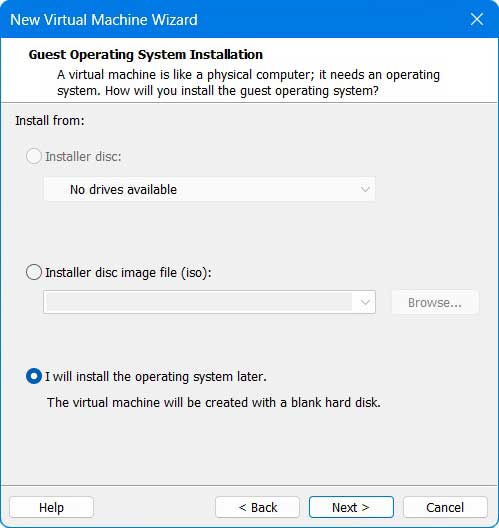
In the “Guest Operating System Installation” window, you can choose which installation file to use for the guest operating system. Choose “I will install the operating system later” and then Next.
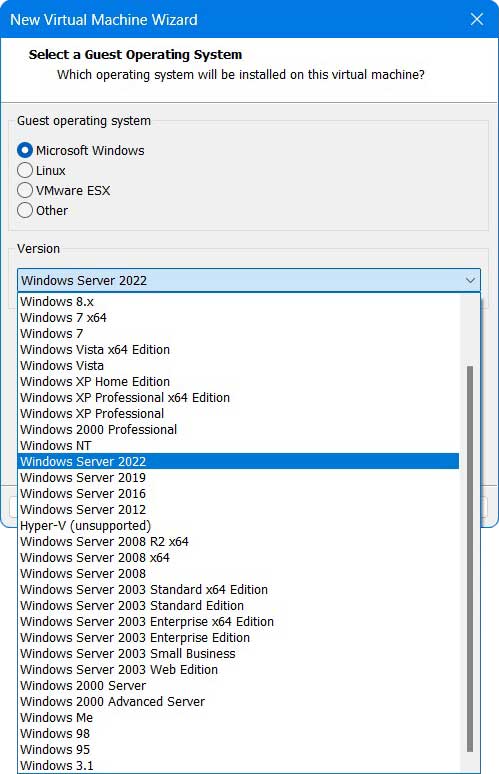
In the “Select a Guest Operating System” window, you can choose which installation file to use for the guest operating system. Under “Guest Operating System” select “Microsoft Windows.” Under Version select “Windows Server 2022” from the drop-down menu. Then click Next.
In the “Name the Virtual Machine” window, you will choose a name for the guest operating system and the location on your host computer where the VM files will be stored. Below are the default name and location chosen by VMware.
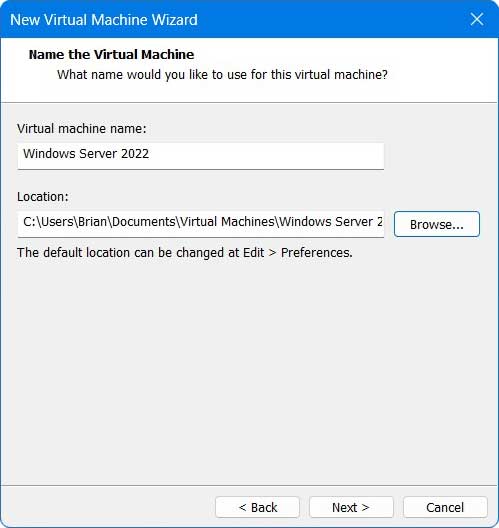
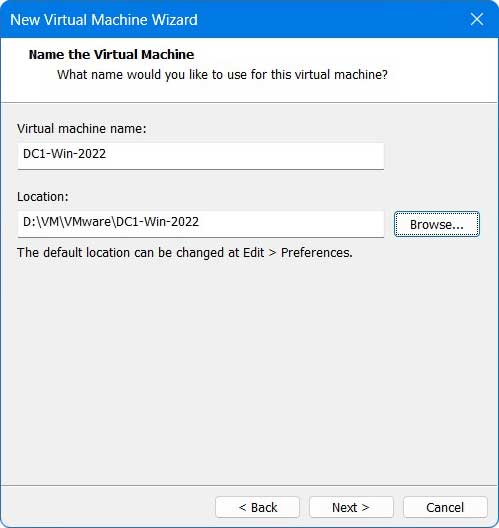
In this lab, the Windows Server 2022 VM will be called DC1-Win-2022. Click Browse to change the location of the VM files.
In the “Browse For Folder” pop-up window choose where you want to install the VM.
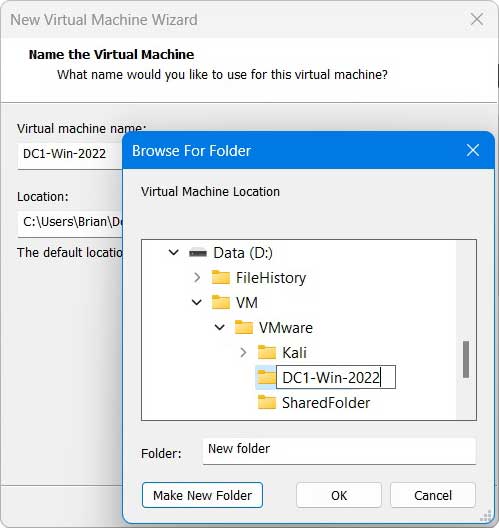
The physical computer used for this lab has two physical hard drives. The Windows 11 Pro host operating system is installed on the C drive. The VM files are stored on a separate D drive to improve system performance. All the VMs are placed under the VMware folder.
To create a folder for your VM, select the parent folder and then the “Make New Folder” button. Our folder name will be titled DC1-Win-2022, the same name used for the VM. When ready click the OK button.
Now the full directory path will appear in the Location field. Click Next.
In the “Specify Disk Capacity” window choose a maximum disk size for your VM and the file structure for storing the VM.
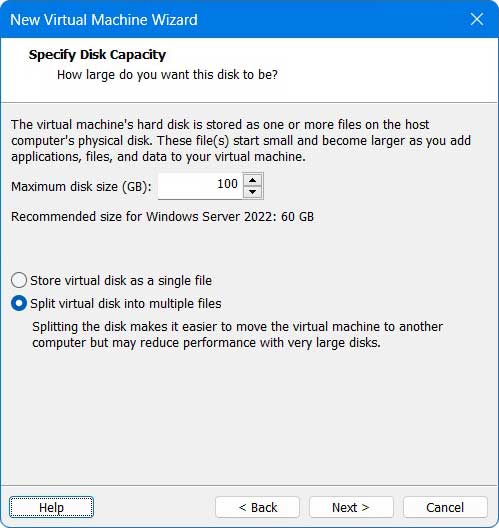
By choosing “Split virtual disk into multiple files” the VM will take up the least amount of room on the physical hard drive, up to the maximum file size. After the initial installation the Windows Server will have few services installed and the total file size will be relatively small. As services are added, such as Active Directory and Domain Controller, the total file size will increase. In this lab, we have increased the maximum disk size from the default of 60 GB to 100 GB in case we need additional space in the future. Click Next.
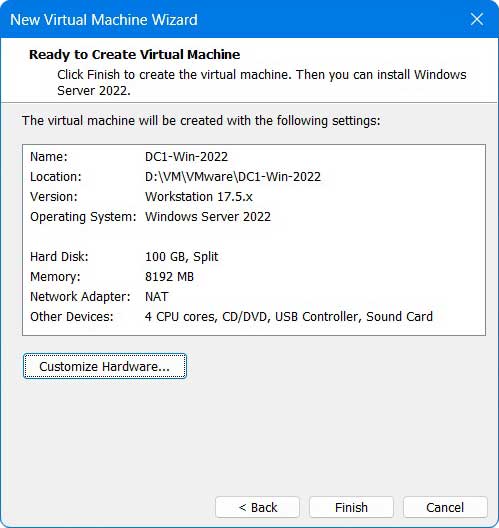
The “Ready to Create Virtual Machine” window provides the settings for the VM we are about to create. Some of the choices were made automatically by VMware such as the memory size, network adapter type, and number of cores allocated to the VM.
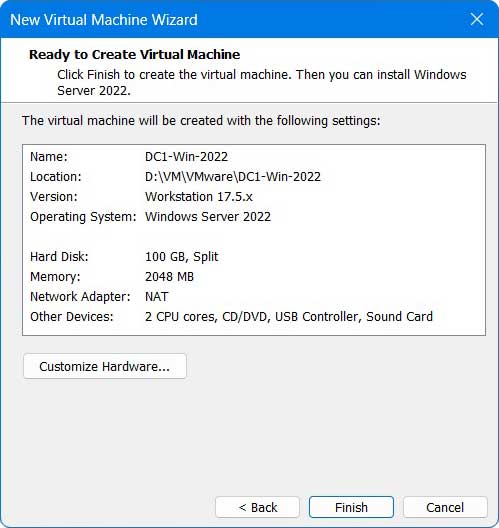
Click on the “Customize Hardware” button to modify the VM settings before it is created. The Hardware pop-up windows appears.
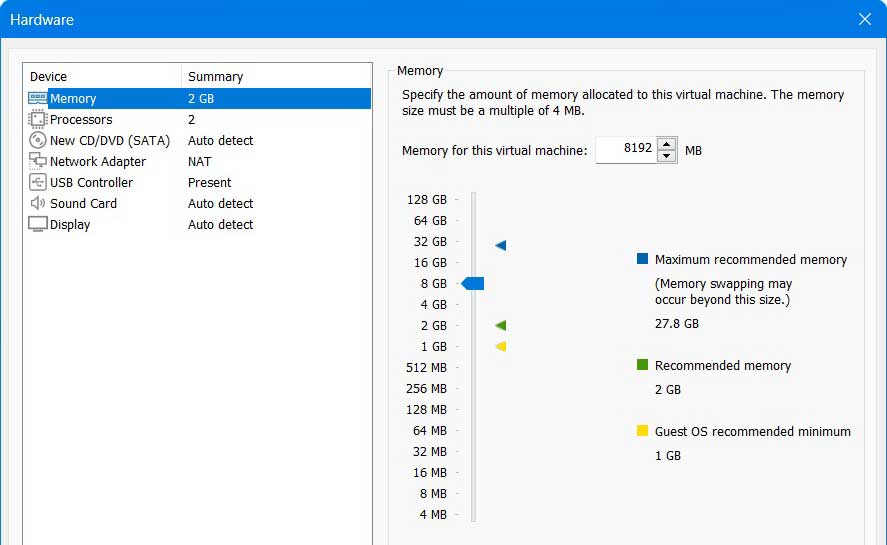
Memory for the VM is set to 2 MB by default. The host computer for this lab has a total of 32 MB. We can afford to allocate 8 GB to the Windows Server. If your system has less total memory than allocate what you can to the VM.
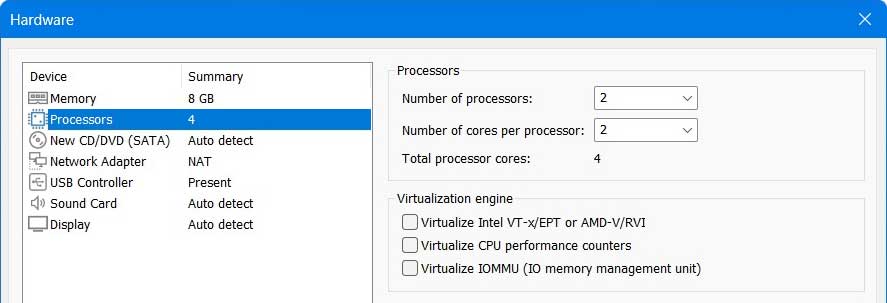
Next we will modify the Processors settings. The “Total processor cores” determines the amount of computing power allocated to the VM. It is set to 2 by default. To add more cores to the VM, increase either the “Number of processors” or “Number of cores per processor.”
The host computer has 6 total cores available. Initially we will allocate 4 total cores to the Windows Server. If the host system runs too slowly while the Windows Server VM is on, we can always reduce the number of cores to 2 after the installation is complete.
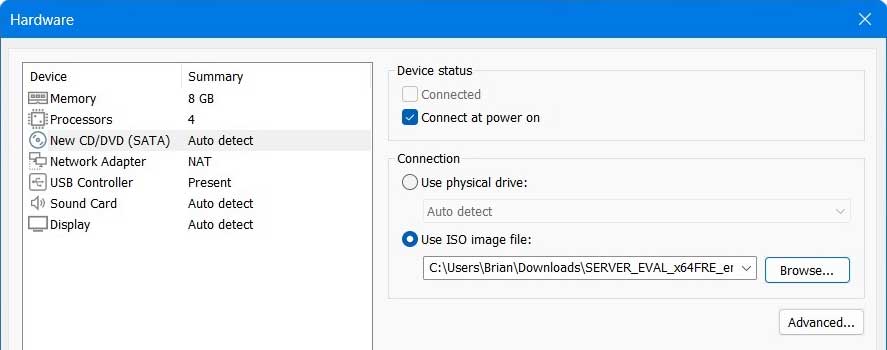
In the “New CD/DVD (SATA)” setting, select “Use ISO image file.” Then click on the Browse button to specify the location of the iso file downloaded earlier.
The “Network Adapter” setting determines the type of network connection used by the VM. The default setting for a new VM is Network Address Translation (NAT), which we will use for the Windows Server.
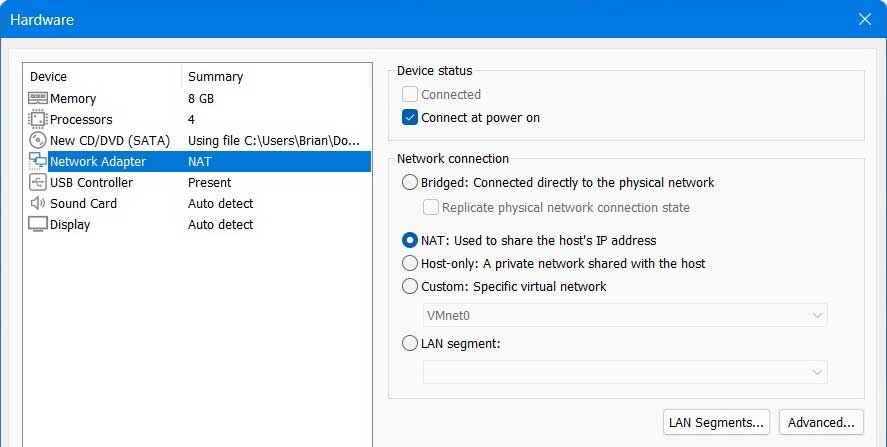
An earlier post describes the network connections available in VMware. To summarize, the NAT setting places the VM on an internal subnet that is separate from your home network. And the VM still has internet access through the same physical network card used by the host computer. All the VMs in VMware Workstation that use the same NAT virtual network will be on the same internal network and can communicate with one another.
The NAT setting provides DHCP service for the VM if required, dynamically assigning the IP address, subnet mask, and DNS. Later in this lab we will statically assign the IP settings for the Windows Server, so the DHCP service provided by VMware won’t be needed.
We are finished with the Hardware settings. Click on the Close button in the bottom right corner of the Hardware pop-up windows.
You will return to the “Ready to Create Virtual Machine” window that now shows the updated settings for the VM. Click on Finish.
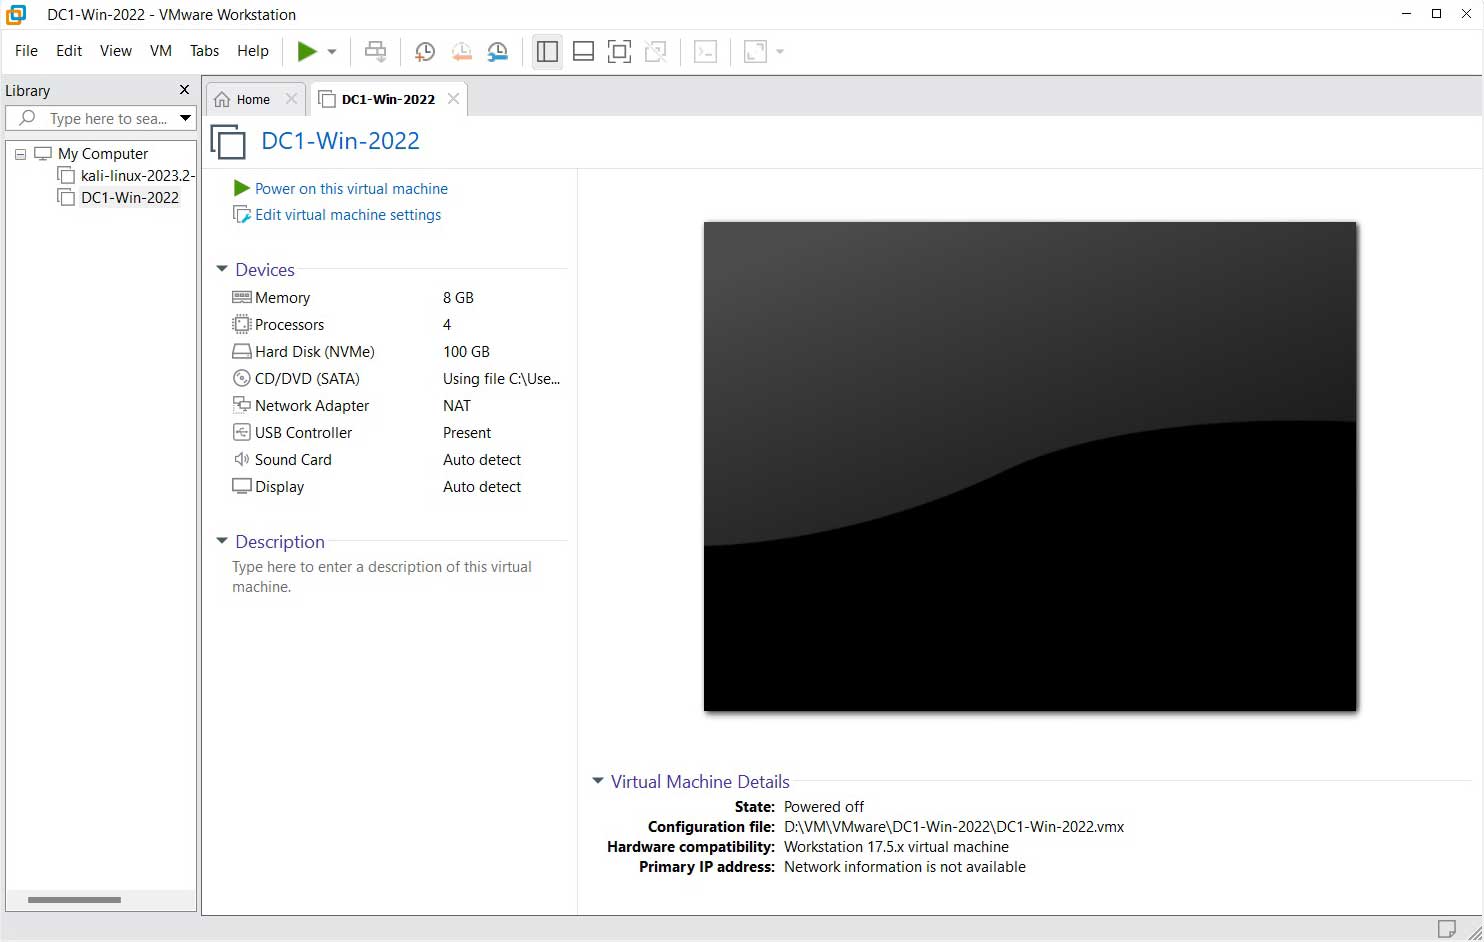
You can now see the new VM created within VMware Workstation.
Install Windows Server 2022 on the VM
At this point we have created a Windows Server VM in VMware Workstation. Yet there is no Windows Server operating system running on the VM.
Now we will power on the VM and install Windows Server on the VM using the iso file.
Power On the VM
We will power on the VM in such a way that it is easier to install Windows Server using the iso file.
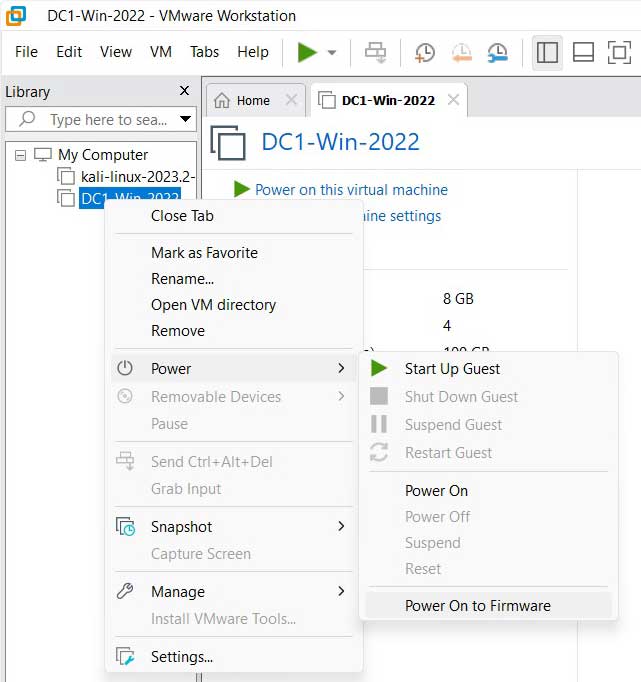
Verify that VMware Workstation is displaying a column in the left part of the screen named Library. If you don’t see the Library column, click on View > Customize > Library in the top menu bar.
Under Library open the “My Computer” menu option to see all the VMs installed on the system. Right click on the name of your Windows Server VM. Then select Power > “Power On to Firmware.”
The VM powers on and displays output in the large right pane within VMware Workstation.

How to Navigate Between VM and Host OS
Before proceeding with the Windows Server installation, we will briefly discuss how to navigate between the VM and the host OS using key shortcuts. In the bottom left corner of the screen you will see a message that changed depending on whether the VM or host OS is currently active. If the host OS is active you will see the message “To direct input to this VM, click inside or press Ctrl+G.”

If you press the Ctrl and G keys at the same time you will be able to access the VM window.
Once you have access to the VM, the message in the bottom left corner of the screen will now read “To return to your computer, press Ctrl+Alt.” If you press the Ctrl and Alt keys at the same time you will be able to access the host OS.
Install Windows Server OS
After powering on the VM for the first time, a “Boot Manager” pop-up window appears asking you to choose how you want to boot up the VM. Choose “EFI VMware Virtual SATA CDROM Drive (1.0)” and press Enter.
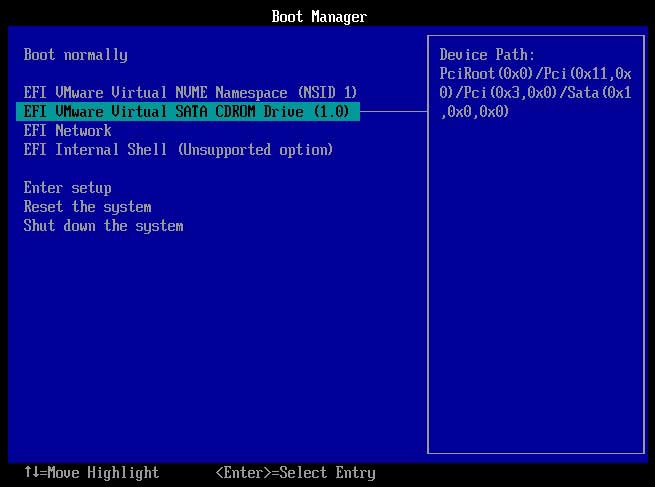
A message will briefly flash across the screen “Press any key to boot from CD or DVD.” Quickly press a key and the Windows installation process will begin.
The “Microsoft Server Operating System Setup” window appears. Change the settings to match your country and click Next.
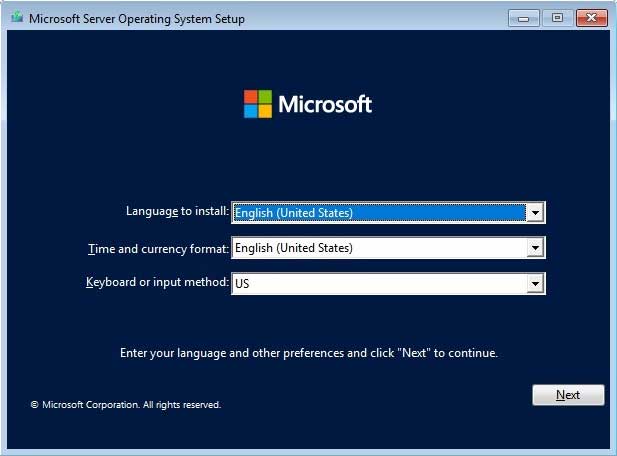
Choose Install on the following window.
Then you will be taken to the window “Select the operating system you want to install.”

For this lab, we want access to the desktop version of Windows Server. Choose either “Windows Server 2022 Standard (Desktop Experience)” or “Windows Server 2022 Datacenter (Desktop Experience).” The license keys for the Standard or Datacenter versions are similar in price. So we will choose the Datacenter version that has more features. Click Next.
On the following window choose to accept the license terms and click Next.
In the window “Which type of installation do you want?” choose Custom.

The next window is titled “Where do you want to install the operating system?” The “Drive 0 Unallocated Space” is the room on our physical hard drive space that we allocated for the VM in an earlier step. Choose Next to install the OS in the unallocated space.

The Windows OS will begin the installation process that will take around 15 minutes.
Eventually the “Customize settings” window will appear. Enter a password for the Administrator account and click Finish.
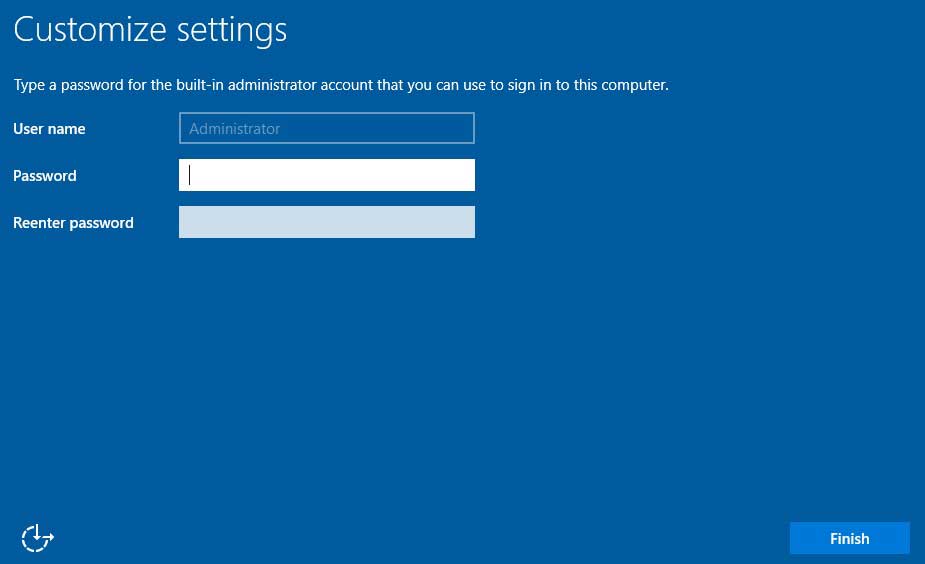
You will be taken to the Windows desktop.
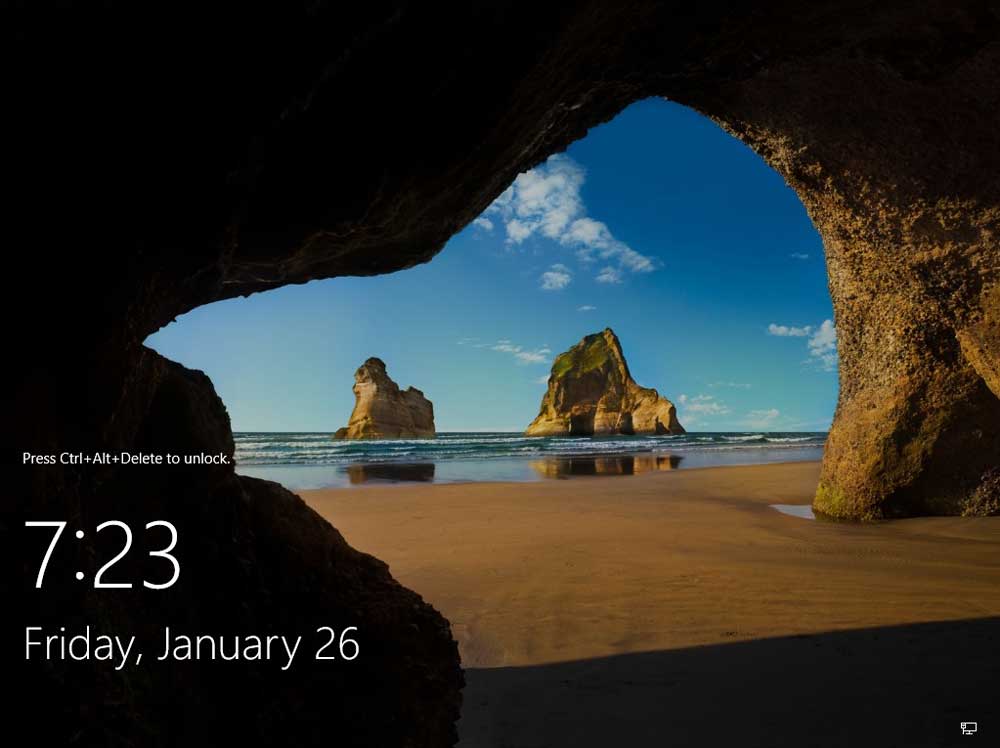
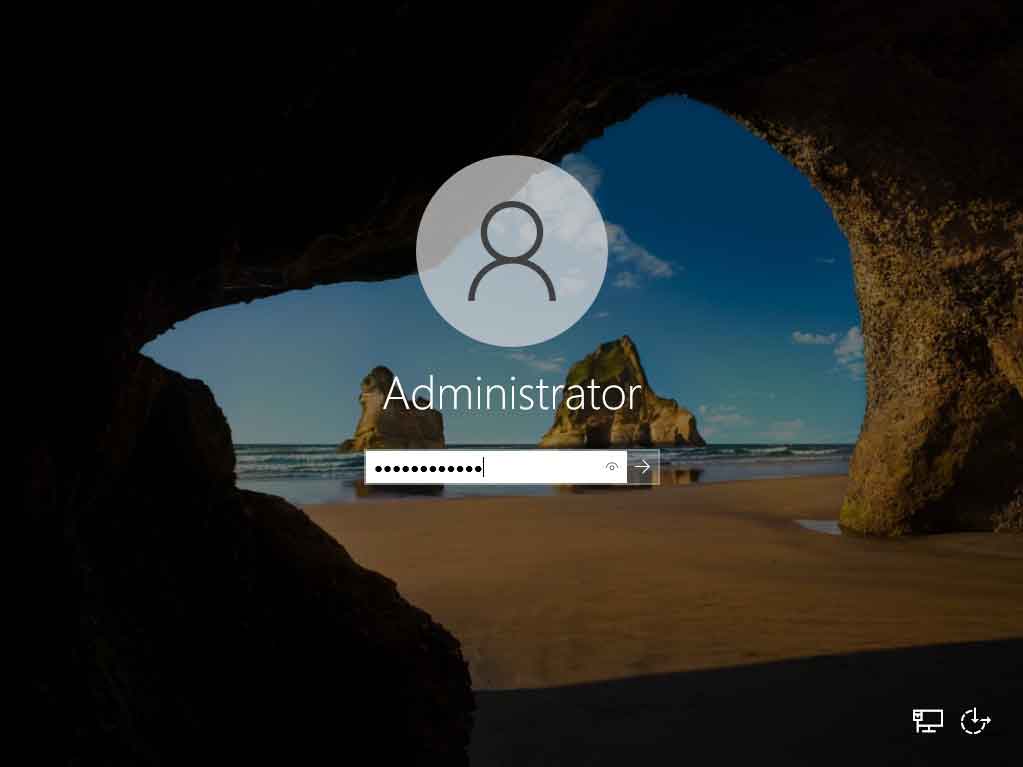
You have to unlock the desktop to enter your username and password and log into the Windows Server OS. Since Windows Server is installed as a VM, the easiest way to unlock the desktop is to right click on the name of the server in the Library column of VMware Workstation. A list of possible commands appears. Choose “Send Ctrl+Alt+Del.”
Enter your password for the Administrator account and press the arrow button to login.
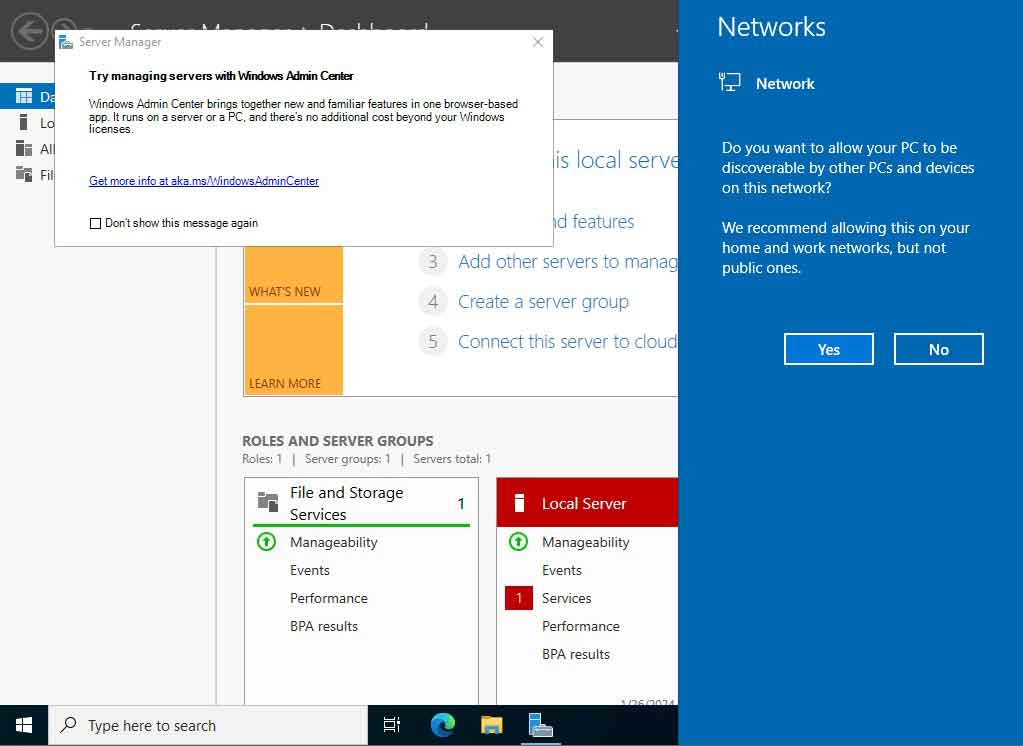
When logging into Windows Server, the Server Manager service will open by default.
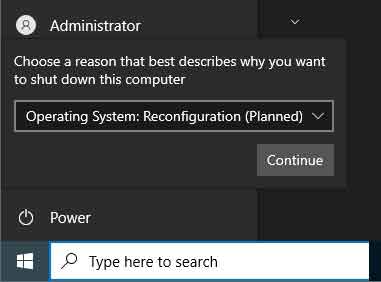
It is always good practice to restart a newly installed OS before proceeding to install applications on the OS. To restart the OS, click on the Windows icon in the bottom left corner, choose Power > Restart.
When prompted for a reason for restarting the OS, choose an explanation that makes sense to you. You may need to view the system logs in the future. Click Continue and the Windows Server VM will restart.
VMware Tools
VMware Tools is an additional application that you can install to increase the functionality of your VM and provide better communication between the VM and your host OS.
VMware Tools provides drivers that allow you to easily move between your host OS and your VM. It allows your VM display to expand or contract to fit the size of your VMware Workstation window. And it allows you to share files between your guest and host operating systems.
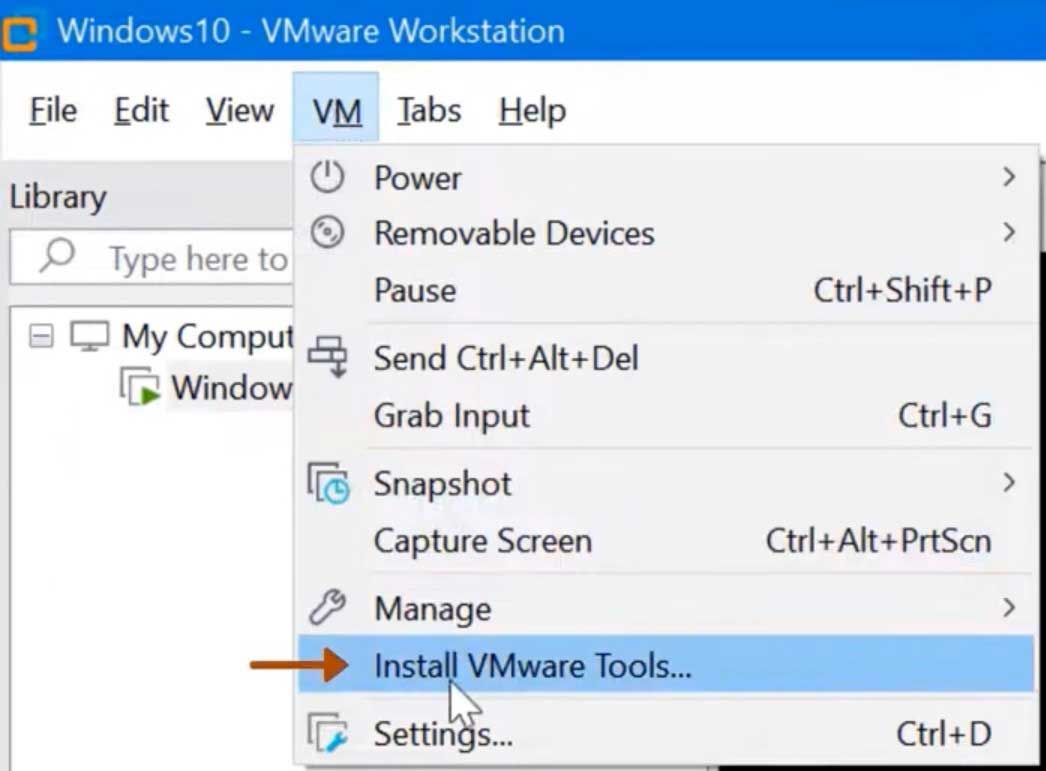
To install VMware Tools begin by clicking on the name of the VM in the Library column. Then from the top menu bar choose VM > “Install VMware Tools.”
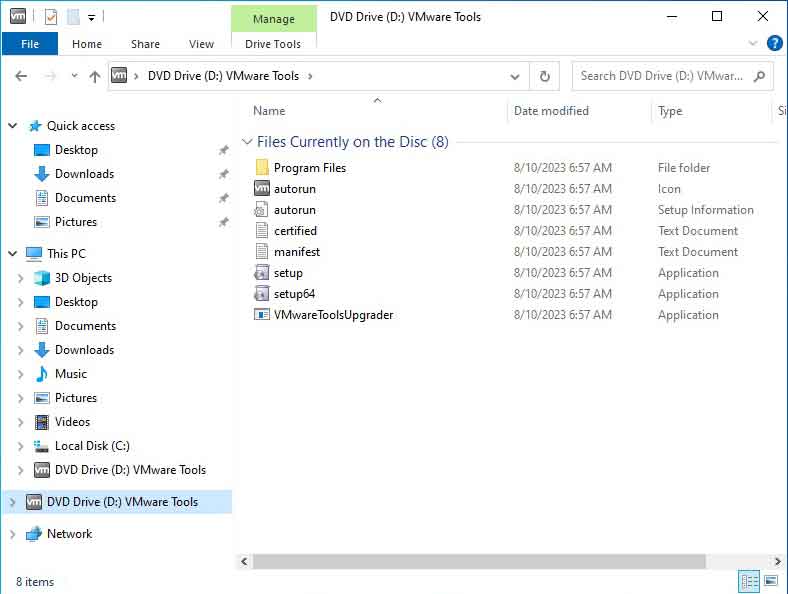
Log into Windows Server. On the desktop click on Start > Documents. In Windows Documents click on the virtual DVD drive titled “VMware Tools.” Double click on the setup64 application.
Minimize the Windows Documents window to see the “VMware Tools Setup” window.
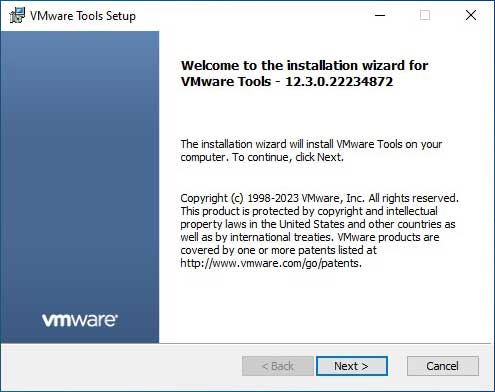
Click Next. Accept the default installation settings. And click Install.
When the installation is complete click Finish to close out the “VMware Tools Setup” window. Then restart Windows Server.
We are done installing Windows Server 2022.
In the next post we will configure Windows Server 2022.
Next Post >> How to Configure Windows Server 2022