In this post, we will configure the Kali Linux operating system (OS).
Table of Contents This Post
This post is part of a series that documents the creation of a home lab using VMware Workstation Pro and Kali Linux.
Home Lab Series of Posts
In prior posts, we prepared Windows to run a type 2 hypervisor, installed VMware Workstation Pro, imported a prebuilt Kali Linux virtual machine (VM) into VMware Workstation, and configured VMware Workstation to run a Kali Linux VM.
Make sure you review the preceding post on how to configure VMware workstation before completing the steps in this post. The prior post includes tips on configuring the memory, CPUs, and networking for your Kali Linux VM. It also describes how to take advantage of VM Tools to share files between your host and guest OS.
The prior post also describes how to create regular snapshots of your VM, in case you make a mistake and need to revert to an earlier state. I suggest you create a snapshot of your Kali Linux VM before making changes to the system.
Log into Kali Linux
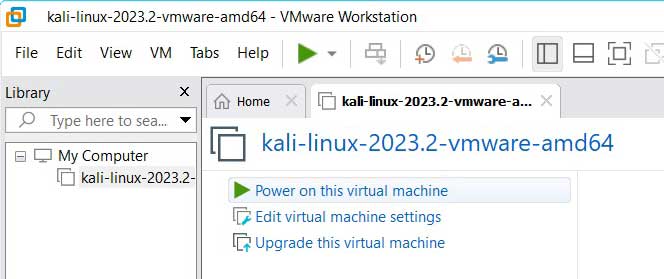
We will log into the VM by first powering it on. In the main VMware window, click on the Kali Linux tab and then choose “Power on this virtual machine.”
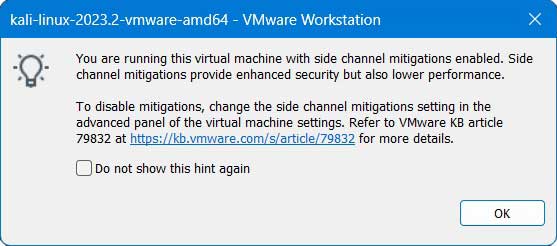
If you see the following pop-up window, click OK.
After 30 seconds or so, the login screen for Kali Linux will appear.
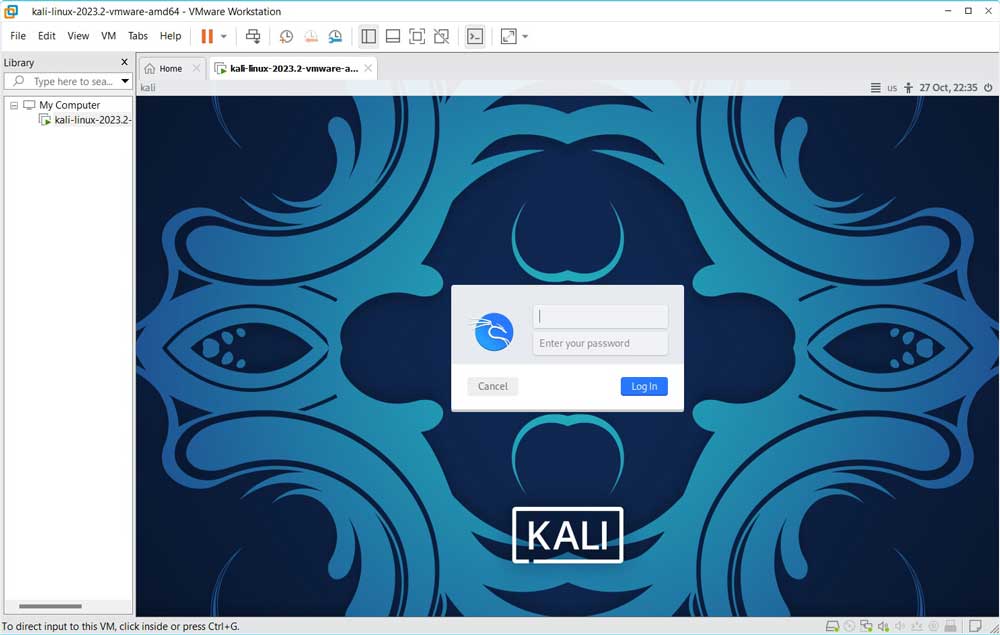
When VMware Workstation is open on your host computer, you can move back and forth between your host or one of the guest virtual machines. You may need to enter Cntrl+G to gain access to a guest VM within VMware Workstation.
To log into Kali Linux enter the username and password. In a prior post we downloaded a prebuilt Kali Linux VM file from kali.org and then imported the file into VMware Workstation. The default login credentials for the prebuilt VM are user: kali and password: kali.
If you install Kali using an ISO image, you will be asked to specify a username and password during the installation process. So you will not have a standard user account named kali.
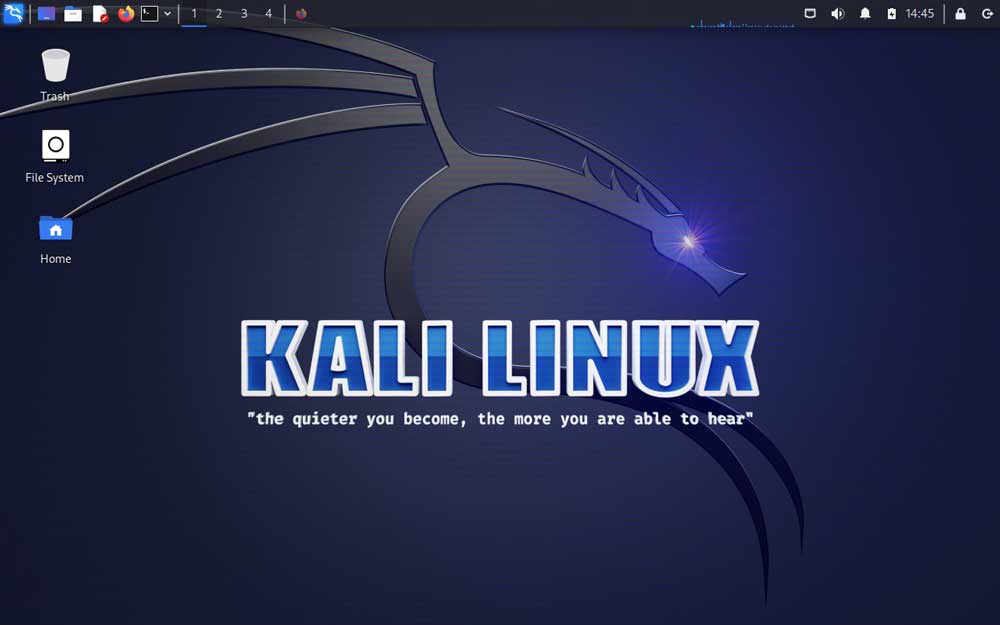
After entering your username and password, the default Kali Linux desktop will appear.
Open Bash Terminal
The terminal window is where you will do the majority of your work within Kali Linux. Open a terminal window by clicking on the black window with a $ sign that is found in the top left corner of the Kali desktop.

The terminal window will appear.

Terminal Settings
You will probably want to change some of the display settings for the terminal. In the top menu of the terminal window click on File > Preferences to access the “Terminal settings” pop-up window.
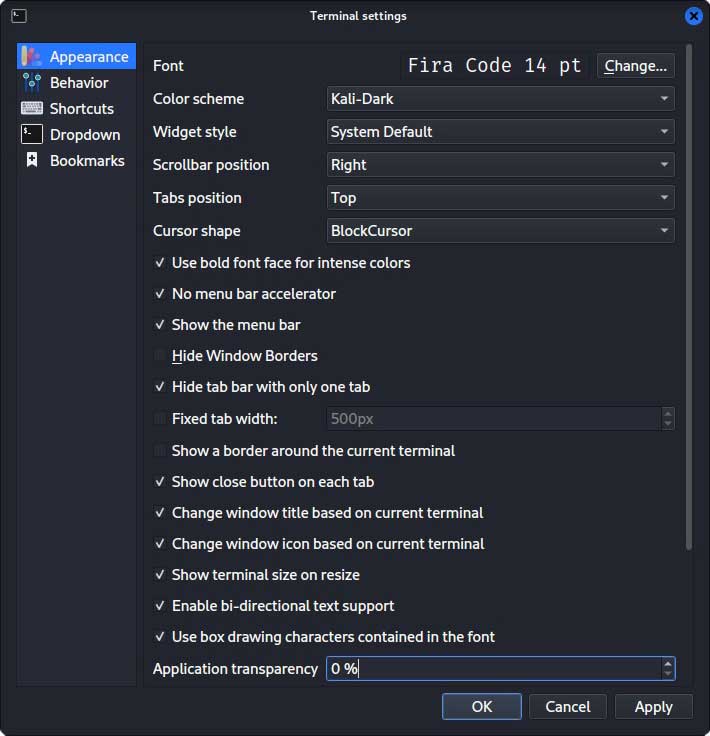
For this lab the terminal default font size has been changed to 14 pt and the background transparency set to 0%. The transparency is modified under Appearance > “Application transparency.” The font is changed under Appearance > Font. You can also make temporary adjustments to the font size from within the terminal window by using the keyboard shortcut Cntrl+ or Cntrl-.
Change Password for Default User
If you imported a prebuilt Kali Linux VM into VMware Workstation, you should change the password for the default user account (kali) and limit access to the system.
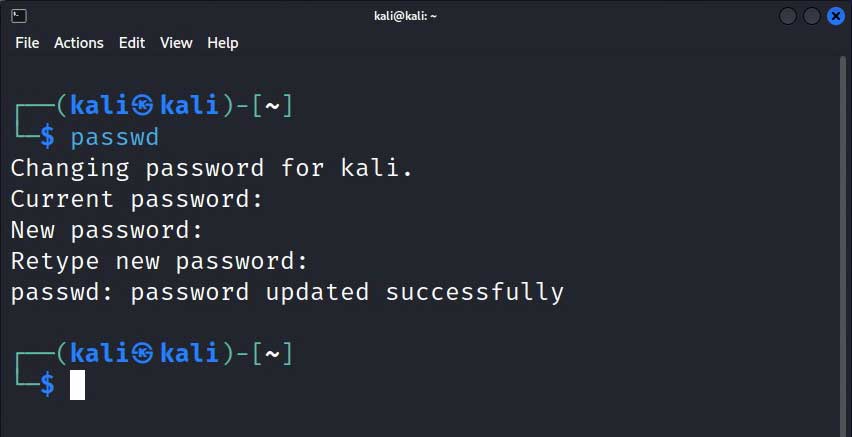
In the bash terminal type passwd at the command prompt. You will be asked for the current password and then the new password. When you are done you will receive confirmation that the password has been changed.
The password prompt in Kali Linux will not display any output as you are typing in the password. Yet when you finish typing and press enter the password will be registered by the system.
Privileged Non-root User
For recent versions of Kali Linux, beginning with version 2020.1, the default configuration has been changed to include a privileged non-root user that is created during installation. It can run either as a standard user or as a super user.
The default user normally runs with standard user permissions, which is all that is needed for most commands. Yet the account can also temporarily acquire escalated privileges and run as a super user to access tools, ports, or services that need advanced administrator rights. For instance, super user privileges allow you to update the system or create other user accounts.
It is best practice to log in as a standard user and run in standard mode most of the time. Then use super user privileges temporarily for administrative tasks that require elevated privileges. If your account is running with standard user privileges and you make a mistake entering a command, you can avoid causing irrevocable harm to your system.
sudo Command
There are two ways that the privileges of the default user can be temporarily escalated to a super user. The first way involves placing sudo at the beginning of each command. Traditionally sudo stands for “superuser do.” It can also be described as “substitute user do” since the user that is currently logged in can perform a sudo command on behalf of another user.
To run a sudo command the user has to verify escalated privileges by entering the account password. After the command runs the user’s rights revert to that of a standard user.
Because sudo allows full access, it should only be used when needed. Examples of sudo commands will be shown later.
sudo su Command
You can also elevate a standard user account to the root user for an extended period of time. At the terminal prompt type sudo su.
You will be prompted to enter the standard account password. Then the account will be elevated to the root user and will continue running in that mode. We will discuss the root account in more detail later.

You can enter Cntrl+D to exist out of the elevated shell and return to the standard user mode.
sudo Group
The default user account that was created during installation has access to elevated privileges because it was added to the sudo group. And the sudo group is given super user rights within the sudoers file.
To view the sudoers file enter the following terminal command.
sudo visudoYou will be prompted to enter your account password. Then the sudoers file will open in a text editor, such as nano.
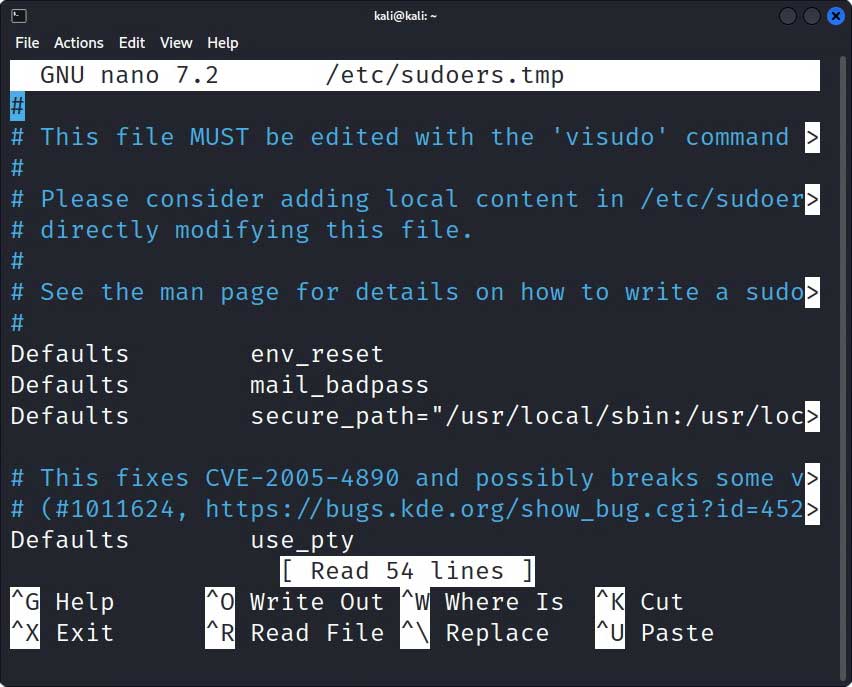
Scroll down and near the bottom of the file you will see the following lines.

The code %sudo ALL=(ALL:ALL) ALL in the sudoers file allows members of the sudo group to run with elevated privileges, as a super user.
To verify that a particular user is part of the sudo group run the command grep '^sudo' /etc/group.
The system response indicates that the user kali is part of the sudo group.

Add New User
For security purposes, you may want to add a new user account and avoid using the default kali user. In this lab we will add a new user using a series of terminal commands. And each command entered into the terminal will be prefaced by sudo. We discussed previously that sudo elevates a standard user to a super user for only one command.
You don’t have to use sudo with each command. Instead you can temporarily elevate your user privileges to root using the sudo su command. Then you can enter the commands provided below while leaving off sudo at the beginning of each command.
Step 1: We will begin by adding a new user and their corresponding home directory. In the terminal enter sudo useradd -m username.
Change the placeholder username to the name of the user account you want to create. In this lab, I create a user named ocean.
The -m argument creates a home directory for the new user. You can see how the system requires us to enter the password for the current user (kali). Then we temporarily receive elevated privileges as a super user, allowing the new user account to be created.

Verify that a folder for the new user (ocean) was created in the home folder. First navigate to the home folder. Then use the ls command to list the folders within the home folder.
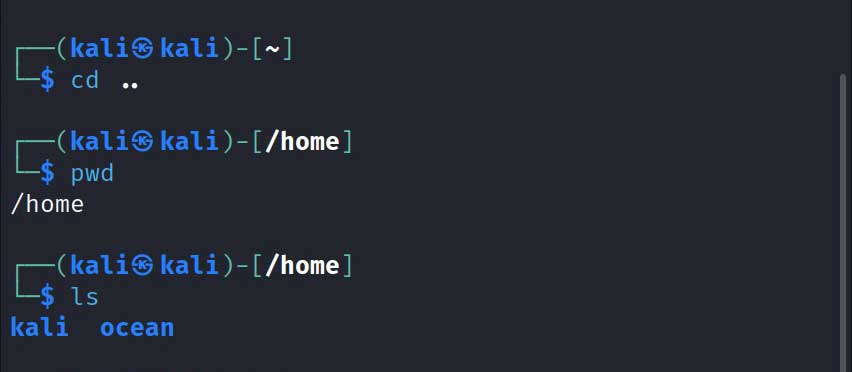
Step 2: Create a password for the new user (ocean).
sudo passwd oceanStep 3: As you recall, the sudoers file indicates that the sudo group has the authority to elevate their privileges. We will add the new user (ocean) to the sudo group, so it will have the ability to temporarily elevate its privileges.
sudo usermod -a -G sudo oceanThe -a attribute means add/append. The -G attribute precedes the name of the group (sudo) that will receive the new user.
Essentially, we are using sudo at the beginning of the command so our current user (kali) has the elevated privileges to add the new user (ocean) to the sudo group. By becoming a member of the sudo group the new user (ocean) gains the ability to also use the sudo command when it is logged into Kali Linux.
Verify that the new user (ocean) is now part of the sudo group, and so has access to elevated privileges. In the terminal enter grep '^sudo' /etc/group. The system responds by showing that the new user account (ocean) and the current user (kali) are part of the sudo group.

Step 4: There are different types of terminal shells in Linux. The following command specifies that the new user will use the bash terminal by default.
sudo chsh -s /bin/bash oceanThe command chsh stands for login shell. The attribute -s precedes the shell you want to set (/bin/bash) for the user (ocean).
Now you can log out of Kali Linux and then log in under the new user account. For this lab, we will continue to remain logged in as the kali user.
Root User
Besides the default standard user kali, there is also a root user account. The root user can do anything on the system, nothing is off limits.
In recent versions of Kali Linux, the root user is not provided a password by default. You cannot log into Kali Linux as the root user unless you create a password for root.
As a new user it is best that you avoid creating a password for the root user. While logged in as root there are no safety prompts in the terminal window, and you may run a command that causes permanent damage to your Kali installation.
Once you have more experience with using Kali Linux, you will probably want to add a password for root and log in as root when you have a lot of administrative tasks to accomplish.
Enable Root Login
In this lab, I will not set up the log in for the root user. Yet I will explain how in case you want to log in as root on your system.
First create a password for the root user while logged in as a standard user (kali).
sudo passwdYou will be prompted to enter the password for the standard user (kali). Then enter the password for the root user two times. I suggest you choose a different password for root than the password for the standard user.
Installing the kali-root-login package will change several configuration files and allow log in as the root user. The command to install the kali-root-login package is preceded by a command to update the system, which we will discuss in the next section.
sudo apt updatesudo apt -y install kali-root-loginRestart your VM. Then you can log into the root account.
Update Kali Linux
The prebuilt Kali VM that we downloaded from kali.org will need to be updated to ensure optimum performance and a mitigation of potential vulnerabilities.
In case you are new to the Linux updating process, I’ll briefly discuss the methodology for finding, updating, and installing software in Kali Linux.
Packages
Modern Linux distributions (distros) like Kali Linux offer a centralized methodology for updating the system. Software updates are usually distributed in packages that provide the operating system, libraries, applications, and services that compose the distro.
Each type of Linux distro has a unique package format. Kali Linux is based on Debian, so it uses the .deb file format.
Repositories
A repository is a remote storage location where your system retrieves software packages. Accessing packages from a repository provides more assurance that the software has been approved by developers and verified to be compatible with your Linux distro. A repository includes a directory and index file to facilitate the managing of packages on a local Linux system.
Like other Linux distros, Kali Linux has its own repositories. The repositories currently being accessed by your system can be found in the sources.list file in the /etc/apt directory. Once a package repository has been specified in the sources.list file, packages can be installed without specifying a source and will be updated automatically. You can switch to a different repository by adding it to the sources.list file and commenting out the old repository you no longer want to use.
View the sources file for your Kali Linux VM.
grep -v '#' /etc/apt/sources.list | sort -uThe contents of the sources.list file will output to the screen.
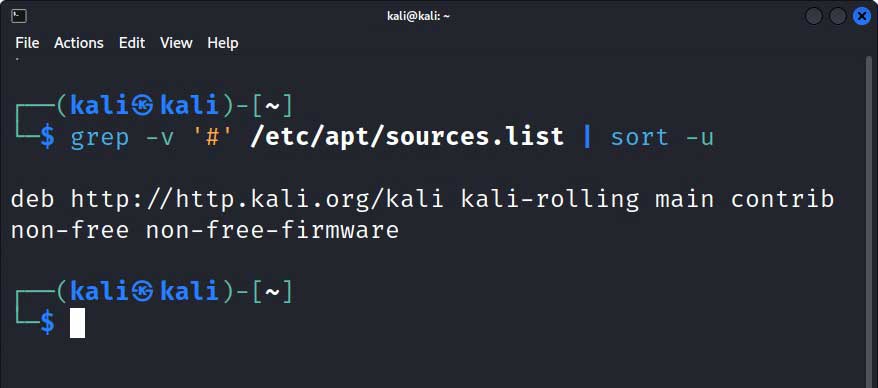
In the above sources.list file http://http.kali.org/kali is the Kali load balancer that will direct you to the best mirror for accessing your system updates.
The branch is kali-rolling.
The packages used are main contrib non-free non-free-firmware, which are all the available Kali packages.
There are two main Kali Linux repositories that correspond to the two main branches (or modifications) of Kali Linux.
Kali-rolling
Kali-rolling is the default branch that is frequently updated. If you import a prebuilt Kali Linux VM into VMware Workstation, like we did in an earlier post, then the Kali-rolling repository will be enabled by default in your system.
Unless you have a good reason, continue using the Kali-rolling repository and forgo modifying the sources.list file. If you want to switch from another repository to Kali-rolling, use the following commands to update the sources file.
echo "deb http://http.kali.org/kali kali-rolling main contrib non-free non-free-firmware" | sudo tee /etc/apt/sources.listsudo apt updateKali-last Snapshot
Kali-last snapshot branch is a point release that delivers more stable software. Switch to this branch by using the following commands.
echo "deb http://http.kali.org/kali kali-last-snapshot main contrib non-free non-free-firmware" | sudo tee /etc/apt/sources.listsudo apt updateEnable Additional Branches
Kali also has two other branches that are meant to be used in addition to kali-rolling.
- The kali-experimental branch allows you to access packages that are being tested.
- The kali-bleeding-edge branch contains packages automatically updated from upstream git repositories.
I wouldn’t recommend you use the additional branches until you are more experienced with Kali Linux and know exactly what you are doing.
Advanced Package Tool
A package manger is used by Linux distros to simplify and automate the updating of a Linux system. Advanced Package Tool (APT) is the package manager used by Debian-based Linux distros. It can search repositories, retrieve packages, install packages and their dependences, manage upgrades, and delete unneeded software on your system.
Advanced Package Tool is accessed through apt commands in the terminal. The apt commands operate as a front-end to the dpkg utiity that installs individual .deb files on the local system.
Commands for Updating Kali Linux
Update Local Database
Your system will maintain a local database (or index) of software packages available on the remote repositories listed in /etc/apt/sources.list. You should update the local database before installing or upgrading packages on your system. For a Kali Linux distro use the following command to update the local database.
sudo apt update -yThe -y attribute allows you to skip the prompts that ask you to enter yes before updating the local database.
Upgrade Installed Packages
After updating the local index of software packages, upgrade the packages currently installed on the system, along with their dependencies.
sudo apt upgrade -yThe upgrade process will take a while. If you are asked if you want to restart services during package upgrades, choose yes.
Remove Unneeded Packages
After upgrading or installing new packages, you can remove unneeded software from the system.
sudo apt autoremove -yShared Folder
You may want to share files between your host OS and your guest Kali Linux VM. If so be careful about creating a permanent security vulnerability. A threat actor or malware could gain access to your host from the VM using the shared folder/directory.
In the prior post in this home lab, we configured VMware Workstation to enable a shared folder between the host OS and guest VM. Review the instructions on the prior post. On the host, we created a shared folder named SharedFolder. And we placed a sample file within SharedFolder titled shared-file-1.text.
We will now configure the guest Kali Linux OS to complete the sharing of files between the host and guest. VMware tells us that the shared directory can be found on the guest VM at /mnt/hgfs.
Verify that the hgfs directory exists by viewing the contents of the mnt directory.
dir /mntYou may find, as I did, that the hgfs directory doesn’t yet exist. So you will need to create it.
sudo mkdir /mnt/hgfsView the contents of the mnt directory again to verify the hgfs directory has been created.
dir /mntView the contents of the newly created hgfs directory.
dir /mnt/hgfsYou will likely find the contents of the hgfs directory empty. The hgfs directory has to be mounted in order for Linux to use it as a shared directory. We can mount the hgfs directory each time we want to use it. Or we can configure Kali Linux to automatically mount the hgfs directory each time we reboot the VM.
Linux contains a filesystem table called fstab that allows you to automatically mount directories each time the system reboots. We will add instructions to the fstab file to automatically mount hgfs.
Open fstab using the nano text editor.
sudo nano /etc/fstabEnter vmhgfs-fuse /mnt/hgfs fuse defaults,allow_other 0 0 at the end of the file and save the file using Cntrl+X.
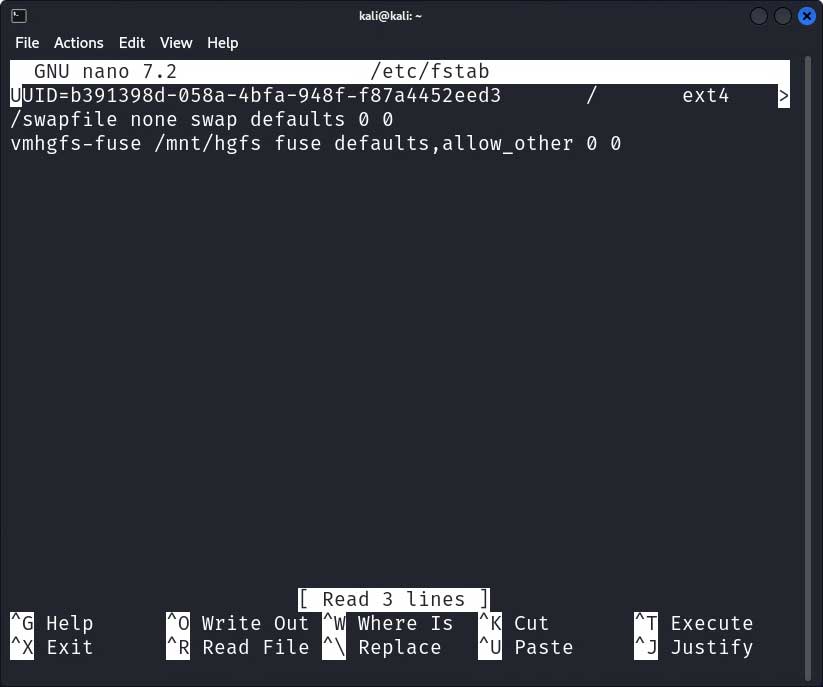
Reboot the VM.
sudo reboot nowLog into the VM and view the contents of the hgfs directory.
ls /mnt/hgfsYou should now see the SharedFolder directory listed under hgfs. View the contents of SharedFolder directory.
ls /mnt/hgfs/SharedFolderIn the previous post in this home lab, we created a file shared-file-1.txt while logged into the host OS. You should see the file located within the SharedFolder directory. Open shared-file-1.text using the nano text editor.
nano /mnt/hgfs/SharedFolder/shared-file-1.txtYou can use nano to view the contents of the file, make changes, and then save the updated file.
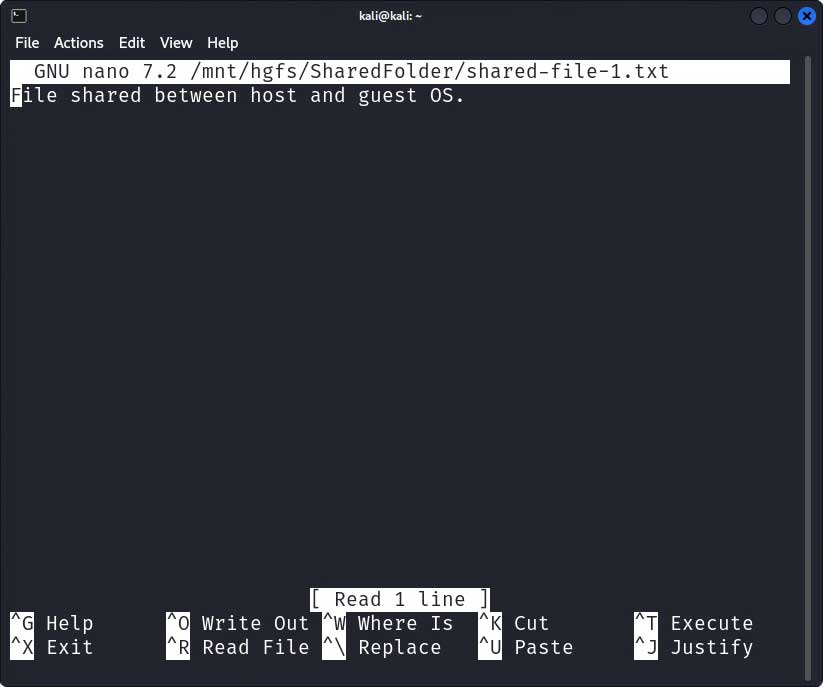
We now have the ability to share files between the host OS and the guest VM.
Install Other Software
You will probably want to install software that is not included in the default installation. Searching for packages in the terminal can be challenging if you are new to Kali Linux.
I suggest you decide upon the software you want to install and then find a tutorial online. Here are some ideas to get you started.
- Add another terminal. I like Guake Terminal.
- Install a code editor. I prefer Visual Studio Code.
- Install a VPN. I prefer NordVPN.
- Add more penetration testing and vulnerability assessment tools.
We are the end of this home lab and series of blog posts. In future posts I will utilize this home lab, created with VMware Workstation and Kali Linux, to build cybersecurity projects. Good luck with your own home lab.

