In this post we will configure Windows settings to run a type 2 hypervisor, which for our lab will be VMware Workstation Pro.
Table of Contents This Post
This post is part of a series that documents the creation of a home lab using VMware Workstation Pro and Kali Linux.
Home Lab Series of Posts
Hardware Requirements
Before installing VMware Workstation Pro you should first verify that your physical computer is capable of hosting guest operating systems.
CPU Requirements
To run 64-bit guest operating systems, the host system must use either:
- An AMD CPU with AMD-V support – All modern AMD processors are supported.
- An Intel CPU with VT-x support – The supported Intel processors are Core i3, i5, i7, i9
Operating Systems Supported
Host operating system can be either Windows or Linux.
Storage Requirements
All types of hard disks are supported: IDE, SATA, SCSI, SSD, and NVMe. It is recommended that you use a SSD or NVMe disk for good system performance.
Have at least 2 GB of free disk space on the host OS.
A dedicated storage drive will also improve performance.
Memory Requirements
Memory needs will vary based on the number and types of programs that are open simultaneously on the host and guest operating systems. VMware recommends 4 GB or more of memory for the host OS. More is always better. I recommend 16 GB for good system performance.
Our Lab Hardware
For this project we are using a Lenovo laptop. It has an Intel core 7 processor with 6 cores, hyperthreading, 32 GB of memory, and 2 NVMe storage drives.
Windows BIOS Virtualization Settings
Processors built for personal computers now include hardware virtualization features that improve the performance of virtual machines running on hypervisors such as VMware, VirtualBox, and Hyper-V. You need to verify that this hardware support is turned on within the Windows UEFI/BIOS of your host computer.
For an Intel processor the hypervisor technology is called Intel VT-x, and for an AMD processor it is called AMD-V.
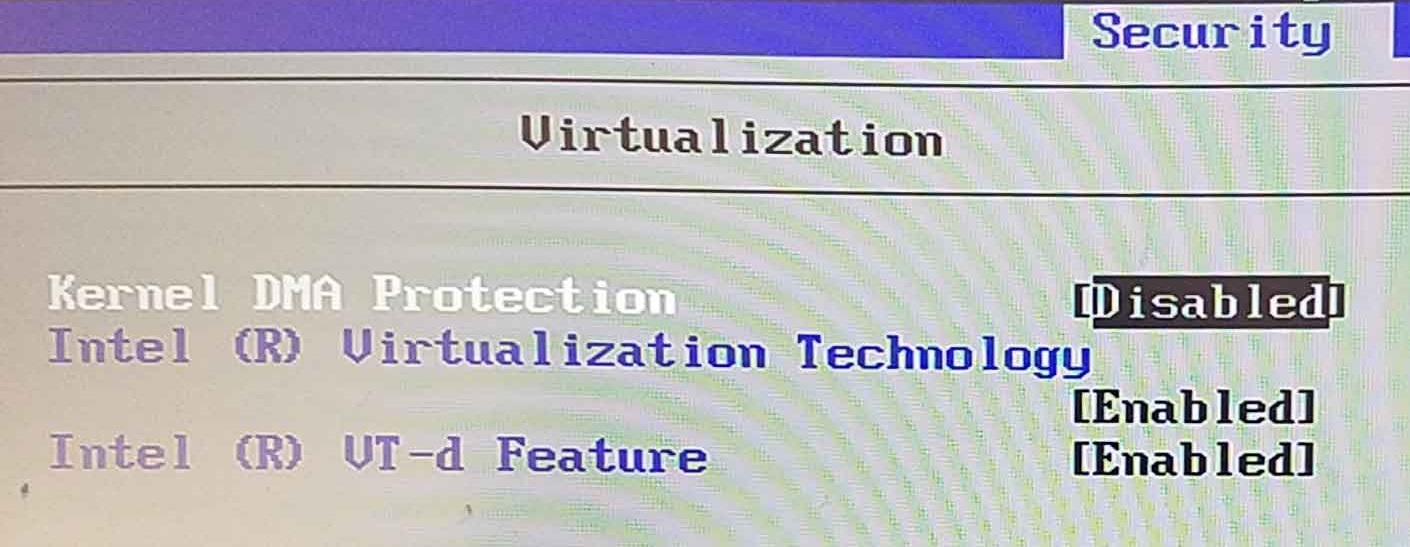
The various computer manufacturers use different function keys to access the BIOS. The Lenovo laptop used in our home lab requires us to press F1 during startup to enter the BIOS menu. Once in the BIOS, choose the Security tab and then verify both virtualization options are enabled: “Intel (R) Virtualization Technology” and “Intel (R) VT-d Feature.”

Windows OS Virtualization Settings
We will make sure that our Windows settings are configured to allow virtual machines to run within VMware Workstation. And we want to minimize conflicts between VMWare and the Windows version of virtualization, Hyper-V.
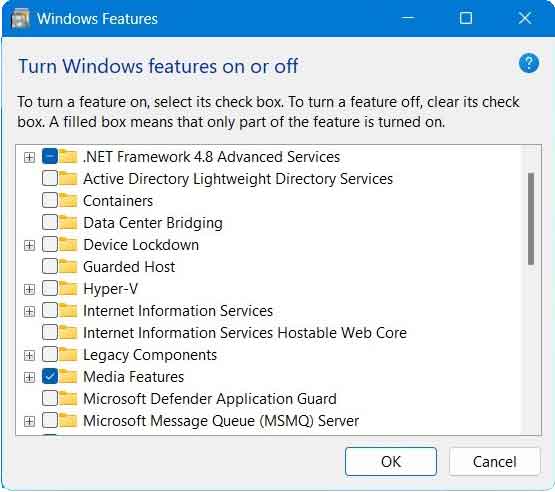
You can view the Windows settings by going to Control Panel > Programs and Features. In the left column click on “Turn Windows features on or off.”

The Windows Features pop-up windows appears. You install an application by placing a check mark next to the name, and you uninstall an application by unchecking it. Hyper-V is turned off to minimize any conflict with VMware Workstation.

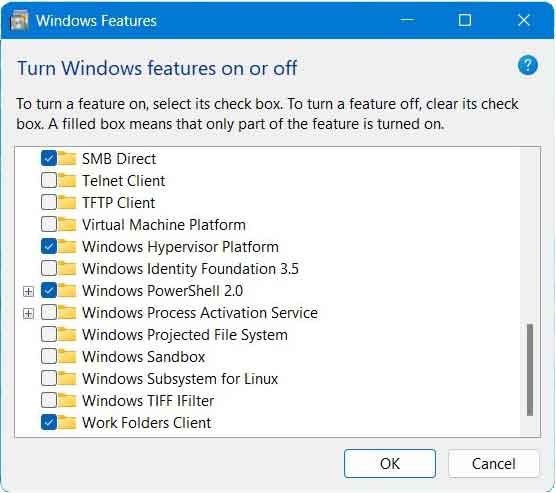
Scroll down to see the rest of the Windows Features.

“Virtual Machine Platform” is off.
“Windows Hypervisor Platform” is on.
“Windows Subsystem for Linux” off. I’m not a big fan of WSL. When I was just starting to learn Linux, I installed Ubuntu within WSL and mistakenly ran some commands that forced a Windows system restore.
After making all your selection click on the OK button.
In the next post you will learn how to install VMware Workstation Pro.
Next Post >> How to Install VMware Workstation Pro


